I happen to love it... There are many different techniques and it's a good idea to try them all until you find one that you do enjoy.
Appliqué refers to applying a piece of fabric on top of another. It is a necessary and handy technique to learn as a quilter. There are two kinds of appliqué: onlaid and inlaid.

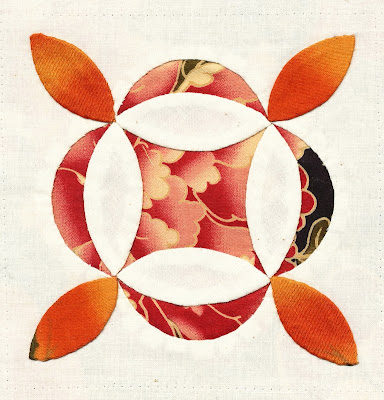
- this pattern is from the Jane Stickle quilt ( Junko's Flower Garden)
Inlaid appliqué is the cutting away of the top fabric and stitching it to reveal the design coming from the bottom fabric. In the above block the outer white fabric has been cut away to reveal the Japanese print below. (Then the eight oval shapes were appliqued on top, or onlaid!)

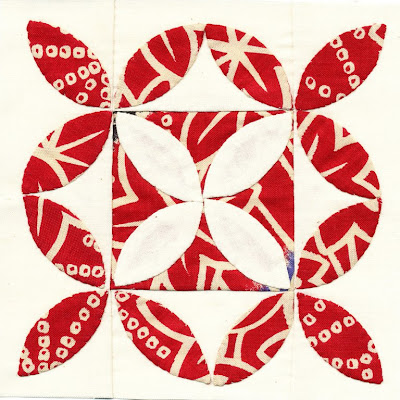
- Pattern is from the Jane Stickle quilt (Cheiko's Calla Lilly)
Onlaid appliqué is the process of placing a design on top of another fabric and stitching it down. In the above example sixteen oval shapes were appliqued on top of the base fabric.
Some prefer a fast and simple way to achieve onlaid appliqué using a fusible web (sold as Heat & Bond, Vliesofix etc). The web is ironed between the fabrics to create a permanent bond. The web can make the fabric stiff so avoid using this for larger pieces of appliqué. The fabric still needs to be finished around the edges to stop the edges fraying. You can either hand (difficult) or machine blanket stitch or apply “Fray Stop” glue to the edges before machine quilting. Here is a video that explains this method.
A more traditional technique is called Needle Turn Appliqué.
Here we will learn how to do this using freezer paper which gives you a sharp edge to turn under. The freezer paper is then removed when you’ve finished. The paper templates can be used over and over again. There are many videos on YouTube showing this technique, try this one and this one which uses the freezer paper under the appliqued shape.
You will need:
14” square of your background fabric
Pieces of fabric for your appliquéd design
100% sewing cotton to match your fabric
Needles: #11 sharps or a straw needle (milliner’s needle)
Fine, sharp straight pins
Pencil
Freezer Paper
Scissors for fabric/ scissors for paper
Iron
Instructions
1. Choose a pattern to appliqué
2. Trace the shapes onto the flat/ dull side of the freezer paper with pencil
3. Cut out the pattern
4. Iron it onto your fabric and cut around the edge leaving a ¼” seam
5. Using the original pattern as a guide, pin your appliqué piece to the background fabric, paper side on top! Mark any points or corners with a pencil or disappearing ink pen.
6. It’s best to start stitching on a straight side of the shape, towards a point.
7. If you are right handed sew towards your left (towards the heart), reverse this if you are left handed.
8. Tie a knot and bring your single thread up through both layers of fabric right on the edge of the paper.
9. Using your needle turn fabric under, take another stitch right next to it but onto the background fabric
10. From underneath bring your needle 3mm away and up, stitching through all layers on the edge of the paper
11. Continue stitching until the piece is sewn down.
12. Repeat with remaining shapes till your pattern is complete
No comments:
Post a Comment