Wednesday, November 14, 2012

Keep Calm and Hexagon On

I’m still here. We’ve been a little busy. Moved house, unpacked most of the boxes, planted the garden and all those things one does in a new house. There’s still a bit to do but hopefully it’ll be finished soon.

When I write it down it doesn’t sound so bad. Don’t be fooled, it was stressful and I never want to move. ever. again. Of course I didn’t get nearly as much sewing done as I had planned. And the work didn’t stop, which is a good thing but I’m looking forward to the holidays.

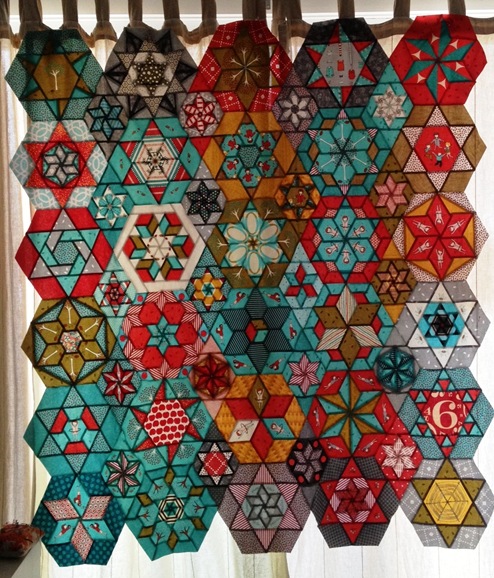
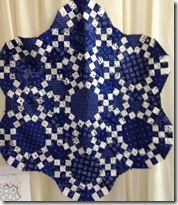
Life is slowly returning to “normal” and I can’t believe that Christmas is just around the corner. And I still haven’t finished my Little Apples Hexagon and Stars quilt. Made very little progress on my Ring Cycles quilt too.

After I sewed all the Little Apple blocks together and held it next to my daughter I knew it was too short. So I’m back at the cutting board coming up with 5 new hexies and 4 more diamonds. Sigh. I really wanted this done for Christmas.

photo (54)

I’ve had to hang the quilt top up on the curtain, apparently my design wall is not big enough for the two quilters in this family. I’m adding {Make design wall bigger} to my huge to do list!

Little Apples Hanging

I love seeing it like this, a huge stained glass curtain. Now, back to work…

Hope I remember to post more pictures soon! Oh and I must post about my new toy, the Sizzix Big Shot Pro. We’ve been having lots of fun with it!

Monday, August 20, 2012

a brilliant weekend and tonight the GWSMQG

At the risk of sounding boring and harping on about how fabulous the Ulladulla Quilters Gathering was, I’ll let these photos convince you:

IMG_3744

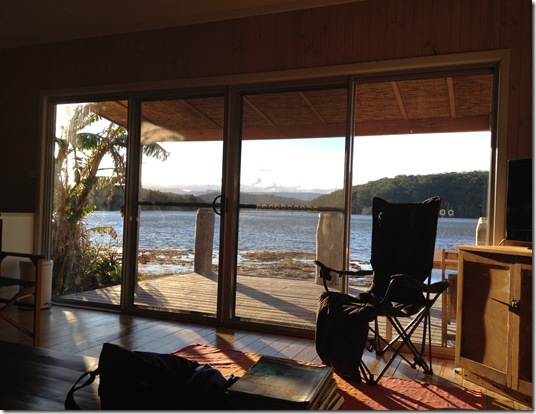
We arrived to this splendid view at our accommodation at Burrill Lake. One of the few times I’ve thought the real thing was better than the “pamphlet”. It was warm, bright and comfy. We’ve already made sure we can book it again for next years retreat. Can you believe the retreat has been running for 17 years already?

It was difficult to leave this view, and the three of us agreed it was lucky we didn’t live here or nothing would ever get done, we’d probably never get off the couch…

But there were quilts to be made! I’m so thrilled with my choice of Lessa Siegele’s Ring Cycle quilt class. Lessa is a very generous teacher, she is full of tips and tricks, not only to help you with the class quilt but handy tips to make general piecing fly.

Her Ring Cycle quilt is even more spectacular in real life than in the photos I’d seen. Over 270 mini 9 patch blocks. It was love at first sight!

IMG_3747

I’d picked up this fabulous fabric at the Hunters Hill Quilt Show recently and I could see the possibilities immediately. Can you tell I’m into bright colours at the moment!

IMG_3718

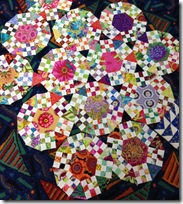
I was really excited once I worked out I could insert some pieced hexagons into the centres of my Ring Cycle quilt. So here is what I think is a great beginning for a new quilt. Not a quick quilt, this will be another slow burner.

Lorena's Ring Cycle

Of course everyone has a different quilt in mind, it’s great to see how others interpret the pattern.

IMG_3759IMG_3760IMG_3767

So what were the other 3 classes doing? I always like to take a look around the workshops and see what everyone else is doing…

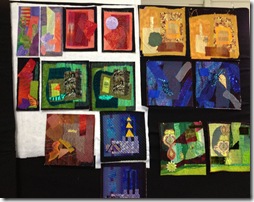
Judy Hooworth was as usual making a big impact with colour with her group. I overheard some women comment that they’re ready to become Judy groupies and they’re planning their next class with her already. She has so much colour and design theory knowledge that you could probably attend her class every year and still learn lots.

IMG_3763IMG_3764

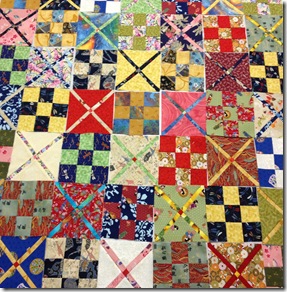
Faye Packham, was getting her class straight into it with the clever Antique Nine Patch and Cross quilts. Faye has amazing patience and gently coaxed some of the newer quilters. It was incredible to see how much this group got done in 2 days and how different this pattern looked in all the different fabric choices.

IMG_3770IMG_3768

Our final day started with the awesome view, some furious sewing in the middle and ended with a {thankfully} uneventful drive back to Sydney.

IMG_37567689808822_2074cb0e3a_q[1]

I’m now looking forward to seeing what others have been up to at the inaugural Greater Western Sydney Modern Quilters Guild meeting this evening. If you are in the vicinity why don’t you pop in and say hi! The group is being organised by Amy and Sheridan with help from Dolores. Should be fun. There’s fabric, friends and food. What more could you want??

Thursday, July 12, 2012

Quilt retreat time, oh yeah!

It’s that time of the year when I start getting excited about the annual Quilters’ Gathering in Ulladulla organised by Marilyn’s Craft Corner.

I’ve received my paper work listing the class schedule and as usual it’s hard to make up my mind what to do. I had really hoped to be able to get away for 4 days this year and do two classes but unfortunately I have other commitments (again). But still, a weekend away with quilty friends with nothing to do but sew is a huge treat.

24 LA mosaic

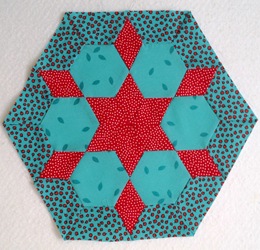
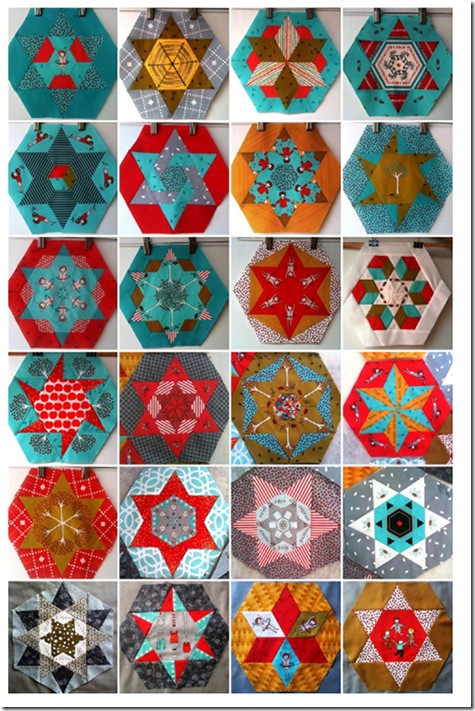
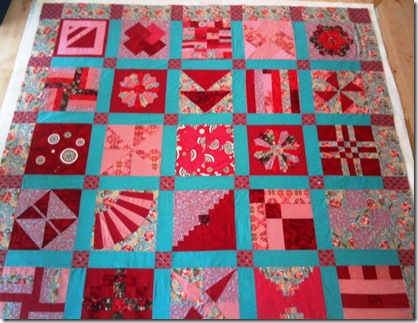
24 blocks so far: Little Apples Hexagons and Stars, Lorena Uriarte

Last year I did a great Hexagons and Stars class with Catherine Butterworth. That was the start of my Little Apples Hexagon and Stars quilt (above). I’ve been so focused on building a new house and finishing A Symbol Recomposed that I now really need to finish my Little Apples quilt to take for Show and Tell. That’s one of my favourite parts of the retreat, catching up with everyone and seeing the quilts finished.

Catherine Butterworth’s Jolly Stars image from Quiltsmith

This year Catherine is teaching a workshop using the Marti Michell Template Set D called Jolly Stars. Catherine is a fantastic teacher and I feel I’ve got the hang of these awesome templates now so I’ve decided to go for something else…

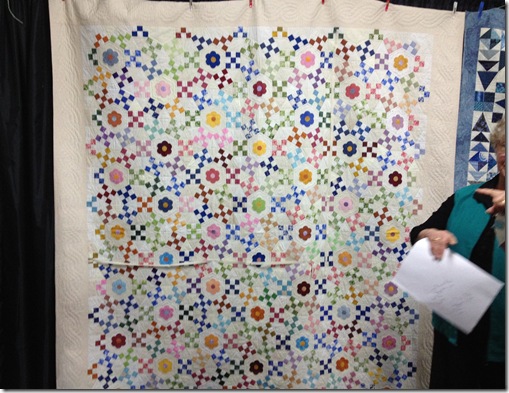
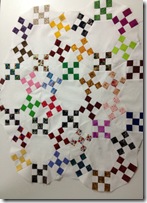
I’m really interested in doing Leesa Siegele’s Ring Cycles class. I’ve seen some beautiful examples of this quilt on the net and I reckon I could get rid of a few scraps making up my 42 9-patch blocks (3.5” big) to take along to class. It’s the kind of quilt I probably wouldn’t get around to make on my own so a workshop will give me a good solid start.


Leesa Siegele’ Ring Cycle images from http://www.wattlerange.sa.gov.au/page.aspx?u=664

Other fabulous workshops are on offer from the award winning Merelyn Pearce. Merelyn will teach needle-turn applique techniques. I look forward to checking out her class. Another great thing about the retreat is that you are all in a big function centre and can mingle with the other classes. See if there’s something you’d like to try next time.

Judy Hooworth is teaching a Collage and Colour class. I’ve done a workshop with Judy before, she is a very skilled teacher and the worthy recipient of the 2012 Rajah Award for her contribution to quilting in Australia. This is the class I’d do if I had extra time.

But there’s loads more, I’m sure by the end of the weekend I’ll be looking forward to next year for the chance to learn from Jennifer Cornish, Beth and Trevor Reid and Faye Packam too.

Do you like going to quilt retreats? Is it odd to want to run away from your gorgeous family, talk about new fabric releases and notions and sew like a banshee once a year?

Friday, June 22, 2012

It's a Blue Ribbon quilt!


CN Binding


Coming back down to earth after a few hectic months. And a dose of the flu!

demolition 1moving again

This year not only did we demolish and rebuild our house, move twice, work hard and have our eldest start high school but I also managed to squeeze in some quilt making!
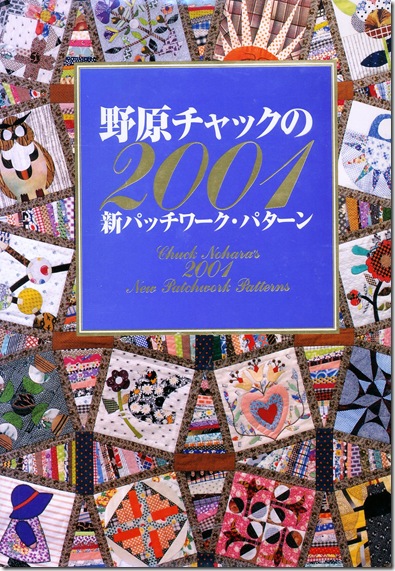
A very special quilt which I've been wanting to tackle since I first opened the pages of Chuck Nohara's 2001 New Patchwork Patterns.

Chuck Nohara book


During such a busy year there is no way I could have done this on my own. Fortunately, it was my turn to pick a project for our annual group entry for the NSW Quilters Guild Sydney Show. And fortunately my friends went along with me and made some amazing blocks for the quilt.


Each month we met and I distributed patterns and sometimes helped with fabric choices to keep the quirky vibe.

photo by Kerry Brack

As the blocks piled higher and higher it seemed like we might actually make it to the June deadline!

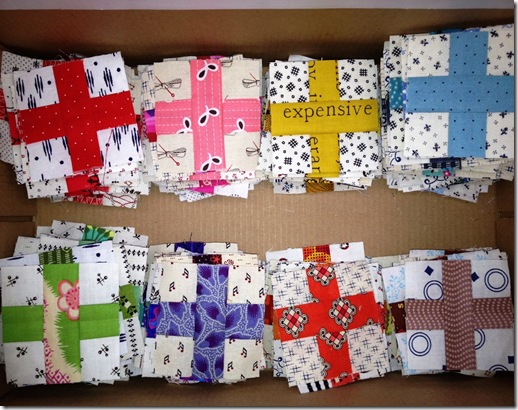
CN crosses


Originally nobody thought we could make a baby Symbol Quilt with the original sashing and border. But I had my heart set on those gorgeous little plus blocks and the wacky pineapple border.

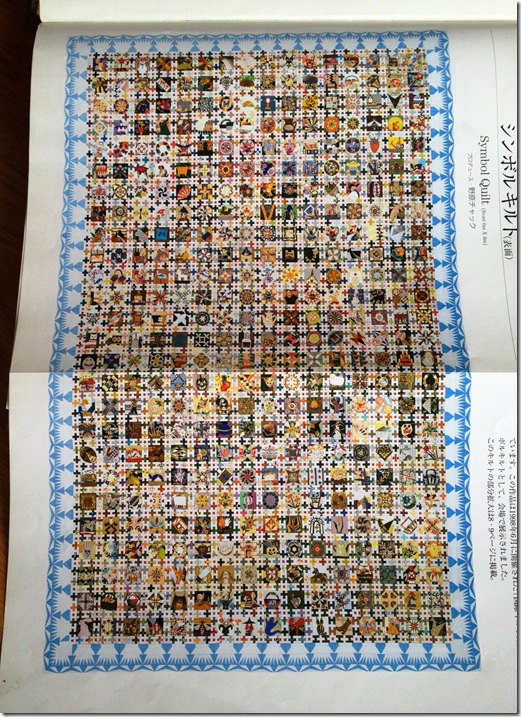
Symbol Quilt photo

Chuck Nohara’s Symbol Quilt is a massive 6 metres by 4 metres!

Just call me crazy and an optimist and surrounded by talented friends. I redesigned the border and sashings to simplify the piecing. The original border was way to big for our 121 5" blocks.


Reversing the dark/ light balance on the border better frames the smaller quilt (mind you it's still big at 230cm x 230cm). The original border is pale blue with white "pineapples" or crowns.

My fabric choices were a bit of a worry to the others. The fine teal pinstripe (Just Wing It) did prove a nightmare to cut and piece. But again I knew I had one of the most talented technicians on the job! Maree I couldn't have done it without you. Your precision and perseverance to paper piece all 44 border blocks and magic some corner blocks into existence whilst I crazily sewed over 600 crosses nudged this quilt over the line.
I think the teal border works because nearly half the crosses are blues. And the 144 corner stones are all orange. I think that pulls it all together.


When it looked like we might actually have a quilt to enter this year I started thinking about quilting. No way could I have gone this quilt justice. Even if I had another year to handquilt I would have struggled with the heavy and large top. So many seams, so much appliqué. Luckily Michele Turner of Pinetree Cottage Quilting agreed to machine quilt A Symbol Recomposed. I had seen her beautiful finish on various Dear Jane quilts, her treatment of miniature blocks respects the maker and the design.


Together we came up with quilting designs for the tricky sashings and borders. As a final nod to this special quilt Michele stitched the name of the quilt ( A Symbol Recomposed), the women who made the blocks ( Maree Blanchard, Kerry Brack, Lorena Uriarte and Loloma Wren) the quilter's name ( Michele Turner) and the woman who inspired this quilt ( Chuck Nohara) into the sashings. Barely visible but hopefully many years down the track a record of the women who were part of this gorgeous quilt.
And now the year is over, the quilt was hung, a blue ribbon was won. The quilt is safely home to be enjoyed by family and friends.
On to planning next year's entry. Our fifth one, Kerry's choice again. I'm looking forward to hearing all about it!

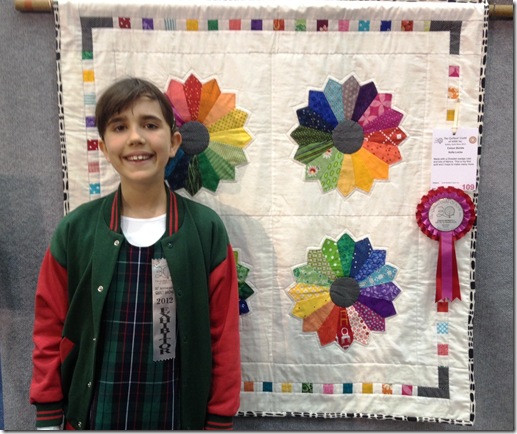
Oh and I almost forgot to mention. This year my daughter entered her first quilt in the Show. And won 2nd place in the Under12 category. Well done Fia on your beautiful quilt! This is Fia’s blog if you want to see more on how she made her quilt.

Sofia's Colour Bursts

Monday, May 21, 2012

Fleecy neck warmer

My son has one of those tricky colours as his school jumper. Since he catches a bus at 7:30am he needed something to keep his neck warm in the morning and then be able to whisk it off and squish it into his bag when it warmed up.

I found some polar fleece that is almost the exact shade of maroon and made two ski style neck warmers.

No doubt I'll be making more of these as winter nears...

Do you want to make one too? They are really easy to make and you could get one done in 10 minutes and polar fleece is quite cheap, you could get three out of a 50cm cut.

What you need:
22 x 16" polar fleece
Sewing machine
Needle and thread in matching colour

Instructions
1) Cut your polar fleece to size. It's folded in half in the photo below.


2) Fold lengthwise with right sides together making a long skinnier strip
3) Sew along the open edge


4) Bring one end up into the tube until the edges are level ( I left it out a bit in this photo so you can see what I mean) See the right side is now poking out?


5) Now stitch around this circle, leaving a 3" gap to turn it right side out.


6) Turn it right side out through this hole and then hand stitch the opening shut (try to use matching threads and invisible stitches).

7) Tahdah, you are done!

Wasn't that easy! Easier than trying to get my son to pose for a photo! So here's a ridiculous one of me wearing it in front of the mirror. You should get the general idea.


- Posted using BlogPress from my iPhone

Monday, March 26, 2012

Finishing your quilt ~ lots of links

Wow, I can never believe how far you guys come in 8 weeks. From not knowing how to thread a sewing machine or which colours go together, to having the skills you need to finish a quilt. In eight weeks, that’s pretty awesome. Very well done to all of you and I hope that this is just the beginning of your creative journey with fabric.

Patchwork and quilting is probably a lot more technical than many of you had hoped. There’s a new language to learn (reverting to inches!!), lots of tools to buy and tricky techniques to learn. You don’t need to remember every lesson in each of your quilts. You could decide to only make machine pieced quilts or that applique is now your passion. I hope that by showing you all the possibilities you can go forward confidently and at least know where to start next time you want to make something or tackle a pattern.

I am wary that there was a lot of information in last night’s class. Someone mentioned we actually need two lessons on finishing your quilt but then which other lesson would I cut out? I think that with last night’s tips, the notes I gave you and a few well documented online tutorials you should be ok but if you’re not, please feel free to contact me.

Hope to keep in touch via our mailing list and can’t wait to see all your finished quilts. I’d love to post photos of them here on my blog so send me the piccies.

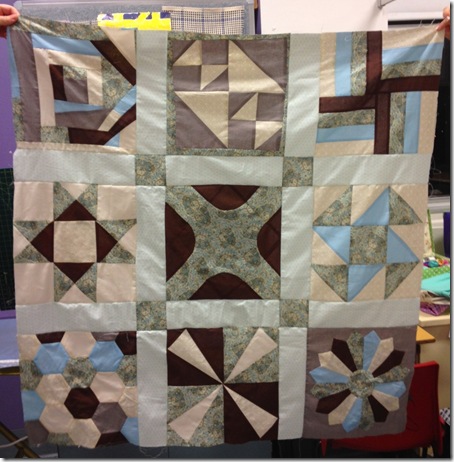
Here’s one that was put together last night. Using the nine patchwork blocks, 3” sashings and corner stones this is now a 40” quilt top. By adding 5” borders that brings it up to 50”, or you could add more if you want a bigger quilt.

student quilt

Only we quilters know how much effort and time goes into making these precious first quilts so give yourselves a big pat on the back ~ What a fantastic job!

Here are the links I mentioned that I believe will be helpful as you finish your quilts:

Great binding tutorial with step by step photos on how to achieve neat mitred corners and smooth joins. http://pir8.freeservers.com/quilting/ending-double-fold-binding/index.htm 

Want to give hand quilting a go? This tutorial has lots of photos as well as explaining the tools and materials to use :http://www.threadsmagazine.com/item/3734/perfect-your-hand-quilting-stitch 

Quilt too big to fit under your domestic machine? Quilt as you go is an option: http://fiberfocus.blogspot.com.au/2008/11/how-to-machine-quilt-large-bed-quilt-on.html 

There are lots more links here from preparing your quilt top for quilting to how to label your quilt: http://www.victorianaquiltdesigns.net/FinishingYourQuilt.htm 

Good luck and stay in touch xx Lorena

Sunday, March 25, 2012

Bigger layout options for your sampler quilt

So you want a bigger quilt? I usually don’t recommend that beginners work on very large quilts as they are difficult to quilt on a domestic sewing machine. It’s probably better to make a small project first, to understand what’s involved and to learn all the techniques. Having said that my first quilt was 88” (224cm) so I understand the compulsion to make your first quilt for your own bed!

Every quilt after that was smaller until I found I could get my large quilts machine quilted by a professional. This is always a possibility for special quilts, when you’re in a hurry or if you just don’t like quilting a large quilt. Machine quilting can be expensive however, a quilt 80” x 80” can cost upwards of $180 to have professionally quilted.The cost depends on not only how big the quilt is but also on the style and density of quilting. The most economical is edge to edge quilting where a pattern is repeated across the quilt.

You can contact the NSW Quilter’s Guild for a list of machine quilters or search the internet for machine quilters in your area. You could also check out this Directory of Machine Quilters.

So you still want to make a bigger quilt, here are your options:

1) Make lots more pieced blocks! For a quilt that finishes at 82” you will need 25 pieced 12” blocks. With sashings cut at 3.5” and a border cut 5.5” wide you will get a quilt that looks like this

image

Lou made one like this but didn’t have enough of the border fabric for a continuous piece. Her solution was to piece the border strips.This a great option if you only have a small piece left and your fabric has a big pattern that makes matching seams difficult.

Louise Quilt

2) Alternate your pieced blocks with some plain fabric blocks to stretch it out.

image

Leslie did this with the quilt for her nephew using a vintage toy themed fabric:

Leslie's quilt

thanks to Amy for this photo! http://badskirt.blogspot.com.au/#!/2011/11/yesterday-i-popped-up-to-north-side-of.html 

3) Alternate your pieced blocks with simple pieced blocks that you can whip up quickly. You can find cutting and piecing diagrams to some simple 12” star patterns in the blog post by Piecemeal Quilts.

image

I used a Variable Star block alternated with pieced and applique blocks in this single bed quilt to give it some uniformity and make it a little bigger.

Fia's Single bed quilt

Next we’ll talk about wadding and backings and how to put the quilt sandwich together.

Friday, March 23, 2012

Quilt Layout and Cutting Diagrams

Here we are approaching Week 8 of our Patchwork and Quilting Course. By now you have determined the size of your finished quilt and need to know how much fabric you’ll need for the backing, sashing, corner stones and border.

You have various options for making some more quick blocks to make your quilt bigger. You can mix in some simple four patch or star blocks or even a plain block.

Sashings and borders can always be made wider too! Make sure to adjust your measurements before you cut your backing when you do this.

I’ve mocked up some sample quilts with the cutting instructions for these previously.

Baby (Cot) Quilt

Using six 12” blocks for a finished size of 37 1/2” x 52”

Square Lap Quilt

Using sixteen 12” blocks for a finished size of 67” x 67”

On Point Lap Quilt (9 pieced blocks)

Using nine 12” blocks for a finished size of 66” (just noticed there’s a mistake on that diagram. It says you need 12 pieced blocks. Please ignore this!)

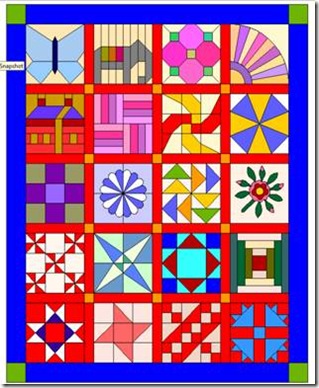
Here is a new diagram for the Twin (Single) Size that some of you were interested in.This is a generous width but making it with only three 12” blocks across looks odd!
clip_image002

Twin Size Quilt

Finished Quilt measures

62” x 76”

20 x 12” blocks

Cutting chart

Sashing strips (red strips)

Cut 31 12.5” x 2 ½”

Cornerstones (yellow squares)

Cut 12 2 ½” x 2 ½” squares

Border Strips (blue strips)

Cut 2 4 ½” x” 68 ½”

Cut 2 4 ½” x 54 ½”

Border Corner Blocks (green squares)

Cut 4 4 ½” x 4 ½”

Backing fabric

3.4 m x 110 cm width fabric.

Choose a fabric with a busy pattern, nothing too light or it will get dirty and need lots of washing!

If you select a fabric with a directional print or large pattern you may need to purchase extra to allow you to match the pattern. Alternatively insert a pieced strip between your backing fabrics to break it up.

To piece your backing fabric: Cut length in half, cut away the selvedge and sew pieces together horizontally like this

 clip_image003

(Allows some extra on width and length for slippage and shrinkage)

** Always measure your own finished quilt before cutting the backing!

Binding

1/2 m cut into 7 x 2 ½” strips, sewn together end to end to fit the perimeter of your quilt + 6” extra

clip_image006

Batting

You will need batting (also called wadding) 4” longer and wider than your finished quilt.

Batting is available in a range of materials: Wool, cotton, polyester, bamboo and in different combinations. Steer clear of battings that are very thick for your first quilts as they are difficult to machine quilt. I recommend 100% cotton or wool 80%/ poly 20%. The wool/ poly batting is lighter, softer and warmer. The cotton needs to be quilted closer together and can shrink a bit. That’s not always a negative, it can give your quilt a lovely crinkly look too.

Other quilting supplies needed:

Sewing machine with a walking foot or alternatively quilting thread, needle and a thimble.

Wednesday, February 29, 2012

Applique tools

#678.2Junkos Rose Gardencheiko's calla lily yoyo

Whilst I love applique I know many people don’t. It can be slow and fiddly but there are times in life that I need to slow down and sit with a needle and thread to think about things. The sewing machine is great for getting things done quickly and putting large pieces of fabric together but for small detailed work nothing beats a good needle and fine thread!

When sewing anything by hand it’s important to have the right tools, a poorly manufactured needle tugs and pulls through fabric.That’s no fun! If your needle is too big it makes large holes in the top layer and then the stitch becomes very visible.  Thick thread sits on top of your work and screams out look at me…  a thread that keeps snapping or tangling can really test your patience. So if you are not enjoying applique it may be time to try a new needle and thread.

When I first started to sew I had no idea what all the numbers and words meant on a needle packet or a spool of thread. Now I know what my favourites are and when to use them. I know that for applique I need fine thread and that usually means 50wt or higher. But not always, unfortunately thread manufacturers haven’t really agreed on a system for measuring thread weights so its important to feel the thread before you order it.

I like to match the colour of the thread to what I’m sewing on for example, for sewing a yellow circle onto a black background I choose yellow thread. I like using the finest thread possible so that whenever the stitches are visible they are barely there. For years I used Aurifil brand thread in a 50wt but recently I’ve started to use a polyester thread that looks like silk. I still use Aurifil for machine piecing and hand sewing but have switched to Superior Bottom Line Thread for hand applique.


This thread is usually used for the bottom thread of the sewing machine and comes pre wound on cardboard bobbins. I find I can get by with just a handful of neutral colours but one day I may splurge and buy a rainbow of them!

When I do need a particular colour I select from my super handy Prewound Masterpiece Threads Donut. It’s hard not to find the right colour here!

frosted-donut-7606a.jpg


My favourite hand piecing and applique needle is a milliners/ straw size 11. I find it is long enough to help me with needle turn applique and holds many stitches for hand piecing. The small eye of the needle means it also doesn’t make big holes in your fabric and you only need a small knot to anchor the thread. Needles are fairly inexpensive so I encourage you to invest in a well manufactured needle! You are looking for a gentle taper from tip to eye, a needle free from burrs that may catch on fabric and a smooth polished eye that doesn’t shred your thread. A fine, straight and sharp needle is a joy to sew with. There’s lots of interesting information on the net if you want to know more about needles.

If you’ve tried to applique by hand and you really don’t think you will come to like it, don’t give up. There are some amazing things that can be done with a sewing machine these days. Michelle Hill is an Australian who has really perfected this technique and her classes are highly sought after. You can read through her basic instructions for machine applique in these instructions for a pattern published in Issue 38 of Quilter’s Companion.

What other tools will you need? Well it depends on how much applique you do. I like small sharp scissors, a wooden manicure stick to help turn fiddly points and some Dritz Fray Check in case I snip a little close to the seam and I’m worried about fraying. Some people like to use small applique pins but I’m not that bothered. If the pins really get in the way I tack my applique down with thread and snip that off later.

So there you go, that’s my tools for applique. Everyone has their favourites so go ahead and use what gives you the best results.

Read my previous post about applique for some tips and techniques.